Wall mounting a TV involves five core steps: choosing the right position and height, identifying your wall type, locating fixing points, attaching the bracket to the wall, and hanging the TV. Done correctly, a wall-mounted TV is more secure than any stand and stays securely in place for the long term. This guide walks through each step — with the specific details that make the difference between a solid installation and one that fails.
Mounting a large TV? This guide covers the general process for TVs up to around 65 inches. For larger screens, follow our dedicated size-specific guides: how to mount a 75-inch TV safely or how to mount a 100-inch TV — weight, VESA pattern, and two-person handling change the approach.
Step 1 — Choose your position and height
Before picking up a drill, decide exactly where the TV will sit. The most important decision is height. The centre of the screen should be at your seated eye level — approximately 100–110cm from the floor for a standard UK sofa (seat height 40–45cm + seated spine height 55–65cm).
Mark the centre point on the wall with a pencil. Everything else — bracket position, fixing holes, cable route — flows from this single mark. Moving it later means filling holes and redrilling.
Also consider: power socket and aerial/HDMI cable entry positions. The bracket will be easier to work with if a socket is within reach of the TV cables, ideally hidden behind the bracket plate or just beside it.
Step 2 — Identify your wall type
Your wall type determines everything: which drill you need, which fixings to use, and how confident you can be in the result.
- Solid brick or concrete — Tap the wall firmly. A solid, dense knock means masonry. Use an SDS hammer drill, masonry bits, and Rawlbolt anchors or heavy-duty nylon plugs.
- Plasterboard on timber stud — Tap and listen for a hollow sound, with a denser area every 400–600mm (the studs). Use a stud finder, then fix into the timber with 75mm screws. Where holes miss the stud, use cavity anchors.
- Plasterboard on metal stud (new build) — Same hollow sound. Stud finder will detect metal. Use toggle bolts or specialist metal stud anchors — standard wood screws will not grip.
- Dot-and-dab plasterboard on brick — A hollow knock but with a brick layer behind. Common in 1960s–1990s UK properties. Requires longer fixings (50–70mm) to bridge the adhesive gap and anchor into the brick.
Not sure? Our UK wall types guide covers every construction type in detail.
Step 3 — Scan for pipes and cables
Skipping this step is a serious risk. Hidden electrical cables and water pipes run through UK walls in positions that are not always predictable — especially in older properties. A pipe and cable detector costs £20–40 from any hardware store and takes three minutes to sweep the area where you intend to drill.
Run the detector in horizontal and vertical passes across the drill zone. Mark any detected pipes or cables with tape before drilling. In many living rooms the wall area directly above the skirting tends to be a higher-risk zone (cables drop to sockets); the bracket fixing area 100cm up is typically clear — but always check.
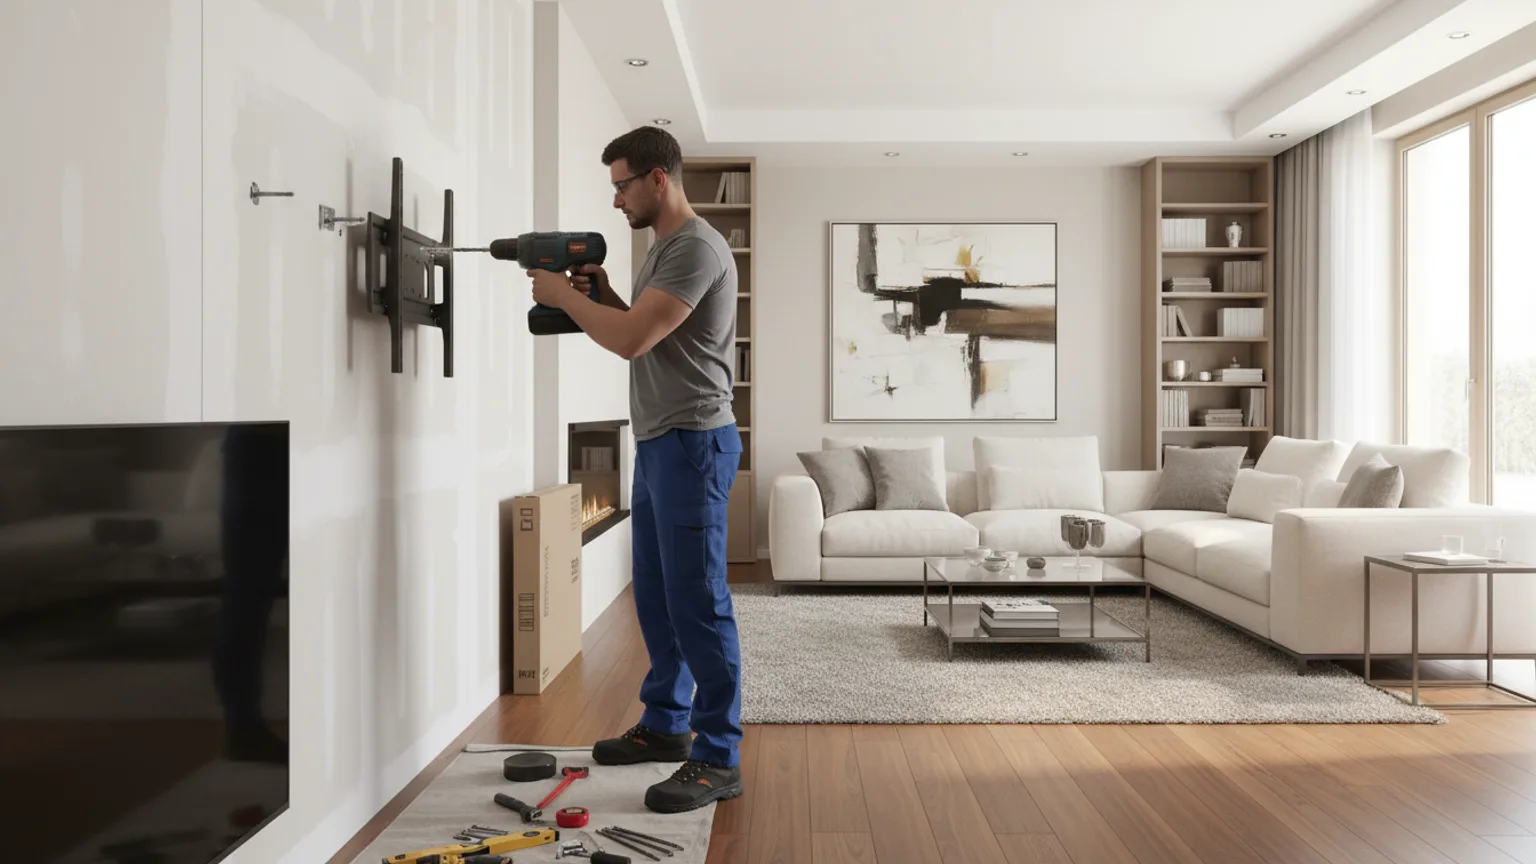
Step 4 — Attach the bracket to the wall
Hold the bracket against the wall at the correct position and mark the fixing holes with a pencil through the bracket plate. Use a spirit level across the top of the bracket to confirm it is level before marking — not afterwards.
Drill pilot holes at each mark to the correct depth for your fixing type:
- Solid wall: 40–50mm depth into the masonry (10mm deeper than the plug length)
- Plasterboard into stud: 60–70mm to pass through board and anchor in timber
- Cavity fixing: depth to match the anchor — check the packaging
Insert fixings, position the bracket, and tighten the screws progressively — alternate between fixing points rather than fully tightening one before starting another. This keeps the bracket seated evenly. Check level again after tightening.
Give the bracket a firm pull test — hold the bracket and pull it directly away from the wall with both hands, applying steady firm pressure. It should not move at all.
Step 5 — Attach the bracket plate to the TV
Most TV brackets have two parts: the wall plate (now fixed to the wall) and a VESA plate that attaches to the back of the TV. The VESA plate uses the four screw holes on the back of the TV — match the bolt size and thread pitch exactly. Standard sizes are M4, M6, or M8 depending on TV brand and size.
Check our VESA compatibility guide if you are unsure which pattern your TV uses. Tighten the VESA bolts firmly but not with excessive force — overtightening can crack the plastic mounting point on the TV chassis.
Step 6 — Hang the TV and check level
This step requires two people for any TV 55-inch or above. One person lifts and positions the TV while the other guides the VESA plate onto the wall bracket hooks. Never attempt to mount a large TV solo — the risk of dropping it or flexing the panel is significant.
Once hung, check level using a spirit level placed on top of the TV or across the screen bezel. Most brackets allow ±3–5 degrees of horizontal adjustment via a levelling bolt — make fine adjustments until the screen is exactly level.
Step 7 — Cable management
The two options are surface trunking (cable cover attached to the wall, painted to match) or behind-wall routing (cables hidden inside the wall). Trunking is reversible and renter-friendly. Behind-wall is permanent and gives the cleanest finish.
If running cables in-wall, drop them vertically from the back of the TV down to a socket positioned directly below the bracket — ideally added by an electrician at a matching height to the TV. Do not run cables diagonally inside walls. Our cable hiding guide covers all options in detail.
When to call a professional instead
DIY TV mounting is a realistic option for a solid wall with a standard fixed bracket. Consider professional installation when any of these apply:
- The TV is 65-inch or larger (two-person professional lift, VESA verification needed)
- The wall is plasterboard in a new build (metal stud — requires specific fixings)
- The wall is Victorian lath and plaster (requires long fixings and correct technique)
- You want behind-wall cable routing (involves chasing or dropping cables in voids)
- The bracket is full-motion (higher fixing loads, critical alignment for smooth arm operation)
- You do not have a pipe and cable scanner
Professional TV mounting from Mount TV includes all fixings and equipment. See our current pricing or get a free estimate in 60 seconds →